New Fish Checklist: How to Set Up a Fish Tank
If you’re starting a new aquarium, the amount of information on the internet can be overwhelming. Wouldn’t it be nice if an experienced aquarist could lead you step-by-step through the entire process? Follow along as we share our best practices for setting up the perfect home for your new pet fish.
While some of these instructions may seem overly detailed, please take them seriously to avoid the most common pitfalls for beginners. After years of running a fish store, we find that it’s very important for new hobbyists to be successful right off the bat. The more mistakes that are made, the more likely people will give up on fish keeping entirely.
How Long Do You Have to Wait to Put Fish in a New Tank?
Preparations for starting a new aquarium can take about one to two weeks for gathering the proper materials, installing the equipment, and starting the aquarium cycling process. Afterwards, the aquarium needs time to establish a healthy ecosystem, and your fish should go through quarantine to prevent the spread of any diseases. Therefore, don’t rush this process by impulsively buying fish or prematurely ordering them online before the tank is ready.

Wait until the aquarium is fully installed and established with a healthy ecosystem before buying fish.
How Much Does It Cost to Set up a Fish Tank?
Because fish are relatively inexpensive pets, many people assume that their aquariums and fish tank accessories will not cost much as well. If you plan on buying brand-new aquarium supplies, be prepared to spend around $200 or more.
Shopping List: What to Get Before Buying Fish
1. Aquarium
Before you can decide how big of an aquarium to get, you must first find the ideal location for it. Fish tanks should be placed on a hard, entirely flat, waterproof surface or aquarium stand that can hold up its entire weight. If the aquarium is not on the ground floor, make sure the floor can also handle the weight. A freshwater tank filled with water, substrate, equipment, and decor can weigh more than 10 pounds per gallon of water.
To avoid any drastic temperature changes, don’t place the aquarium in direct sunlight, next to the air conditioning and heating vent, or in front of a constantly opening door that leads outside. If you plan to keep shy fish, find a quiet environment away from high traffic areas, flashing TV screens, or lighting that causes moving shadows. Furthermore, make sure the fish tank is near an electrical outlet to power your equipment and near a water source and drain for easy water changes.
Once you’ve decided on the final location, you can measure the available space and determine what size aquarium you can get. Many beginners choose a 10-gallon fish tank as their first aquarium, but in general, larger aquariums are preferred because a) more water volume helps to dilute the toxic waste chemicals produced from your fish’s poop and b) you can keep more fish without overcrowding them. In the United States, certain pet store chains like Petco offer sales three to four times a year where cheap fish tanks are sold for $1 per gallon in size. Rimless aquariums or tanks with low iron glass tend to be a lot more expensive, so we generally don’t recommend them to beginners.

Rimmed, glass aquariums are a favorite, cost-effective option for both beginners and veterans.
A question we frequently hear is whether you should choose a glass or acrylic aquarium because both have different pros and cons. Glass aquariums are usually cheaper, less susceptible to scratching, and often come with a rim that helps to level out any unevenness between the aquarium glass and the surface it stands on. Rimmed glass tanks must be firmly supported on all four corners, so do not place a Styrofoam or other pliable mat underneath it. If the tank is filled with water, the rim will sink into the Styrofoam, which will start pushing against the bottom panel and can lead to cracking.
Acrylic aquariums, on the other hand, are more expensive, but they are ideal for very large volume tanks because the bonded seams are much stronger and less likely to break. They are also lighter in weight and better insulated against temperature changes. Acrylic tanks (and rimless tanks) are designed to be supported on their entire bottom panel, so a Styrofoam or yoga mat can be used to help buffer against unevenness between the aquarium and the surface it stands on.
2. Aquarium Lid
Many people try to reduce costs by not getting an aquarium hood or top, but they don’t realize that a tank lid saves money in the long run by minimizing loss of heat and water through evaporation and protecting your fish from jumping out. (These valuable benefits are another reason why we don’t recommend rimless, lidless tanks for beginners.)
Glass lids are very cheap and relatively clear for viewing purposes. The glass top usually comes with a plastic strip in the back that can be customized to cut holes for filtration, airline tubing, and electrical cords. Make sure the openings are very tight so that fish and invertebrates cannot escape.
Acrylic lids are more costly and tend to droop into the water over time. The flexibility of the material is especially inconvenient if you try to make a hinged flap for feeding fish and it becomes warped over time. Lexan polycarbonate sheets don’t absorb water as readily and are sometimes used for homemade aquarium lids, but they are still more expensive than glass.
3. Heater
While certain fish species (like goldfish, Japanese ricefish, and white cloud mountain minnows) can handle cooler temperatures, the majority of freshwater pet fish prefer warmer, tropical temperatures between 74-80°F. Therefore, if your home is lower than this range, you need to buy an aquarium heater to prevent your fish from getting sick. Plus, get a thermometer to help you determine if the aquarium heater is working properly or has been turned off.

An adjustable heater is preferred because it allows you to change the water temperature for keeping different species or treating sick fish.
As a starting point, select a fish tank heater with approximately 5 watts (W) of heat per 1 gallon of water if a) you need to heat the water up to 10°F above room temperature and b) you have a tank lid that retains warmth and prevents evaporative cooling. For example, if you have a 5-gallon betta fish aquarium that meets those conditions, you could get a 25W heater. However, if that same betta tank is kept in an office building or school classroom with lots of air conditioning, you need to upgrade to a 50W heater instead.
In general, it’s safer to err on the side of getting a heater that’s the next size up than a weaker one that constantly struggles to raise the temperature. Fortunately, heaters cost relatively the same amount regardless of size or wattage level. Also, if you own a bigger aquarium that requires 200W of heat, for example, it’s a better to purchase two 100W heaters (rather than one 200W heater). That way if one heater shuts off, the second heater serves as a backup to prevent the water from getting too cold. For more help on choosing the right aquarium heater, read the full article.
4. Filter
If you’re a fish keeping beginner, don’t let the internet convince you to start with a canister filter. They are more difficult to clean and maintenance, and they’re not necessarily the “best” filter out there. We typically recommend a sponge filter because of its gentle flow and reliability. They are simple to install and easy to clean every month. For more information, read our article on how to install a sponge filter.

The Aquarium Co-Op sponge filter comes with the Easy Flow curved uplift tube to improve water circulation and increase oxygen levels in the water.
5. Lighting
Lighting is mostly a concern for those who are keeping live aquatic plants. If you have no aquarium plants, you can use a fish tank kit that already comes with a light or choose an appropriately sized aquarium hood with a built-in light. If you are growing aquarium plants, install an LED planted tank light with a power outlet timer to keep algae growth under control. For more help, learn about how to pick the best planted aquarium light.
6. Substrate and Decorations
Substrate refers to the ground covering on the bottom of your fish tank. Some of the most common options include aquarium gravel, sand, and plant substrate. The substrate, rocks, driftwood, and aquarium decorations can sometimes be covered in dust particles, so rinse them in water to avoid getting cloudy water. (Do not wash anything in soap or cleaning products, since the remaining residue can be harmful to fish.)
Aquarium backgrounds are great to use because they hide all the tangled wires and tubing from view and prevent the fish from seeing any scary shadows on the wall behind them. You can buy a fish tank background from the pet store, cut out a sheet of black trash bag or colored poster board, or paint directly on the rear panel of the tank. We prefer darker colors like black (rather than blue) because fish and plants stand out well against a dark background and algae isn’t as noticeable.
7. Other Aquarium Accessories
To disinfect tap water, many water treatment facilities now use chloramine, which is deadly to fish and does not evaporate as readily as chlorine. Therefore, don’t forget to buy some water dechlorinator to make your tap water safe for fish. Of course, your fish need something to eat, so try some of our favorite, high-quality fish foods. Aquarium water test strips are also very useful for determining if poor water quality is making the fish sick.

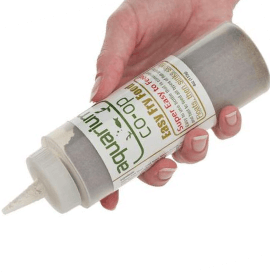
While all water conditioners do an adequate job of dechlorinating tap water, we like to use bottles that comes with a pump head for easy dosing without any measuring.
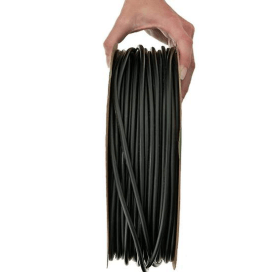
An aquarium siphon is a must-have if you want to save a significant amount of time with tank maintenance. Use this simple length of hose with a bucket to vacuum the substrate and remove fish waste that has collected over time. Read this tutorial for directions on how to use one.
How Do You Start a Freshwater Tank for Beginners?
- Set up the aquarium stand or clean the counter space where the tank will go.
- Rinse out any dust from the aquarium and accessories, and install the tank background.
- Put the tank on the aquarium stand, and pour in the substrate.
- Place the filter and heater in the tank, and add decorations to hide the equipment.
- Fill the aquarium with room temperature water and dose the dechlorinator.
- Plant the aquarium plants. Follow this guide for steps on how to set up a fish tank with live plants.

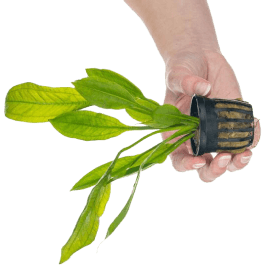
Partially fill the fish tank with 4 to 6 inches of water to help support the plant leaves while inserting the roots into the substrate.
- Install the lid and light, and wait 30 minutes before turning on the equipment. (The heater requires time to adjust to the water temperature.)
- Wait 24 hours to make sure everything is working properly and no leaks appear.
- Start cycling the aquarium (e.g. growing beneficial bacteria and/or live plants to make a safe environment for fish to live in) by using these instructions.
- Once the aquarium has a healthy ecosystem that can process fish waste, gradually start adding fish. Consider putting all new fish in a separate quarantine tank first to cure them of any diseases before they enter the main tank. For information on quarantine aquariums, read this article.
Frequently Asked Questions
- How do you set up a betta aquarium? See our detailed instructions here.
- How do you set up an aquarium for goldfish? Read our fancy goldfish care guide.
- How do you set up a planted tank? See our step-by-step article.
If you enjoy articles like this, don’t forget to sign up for our newsletter to receive a weekly email with a summary of all our latest blog posts, favorite products, and more!


